How to Edit Videos on Windows 10 Using Microsoft Photos
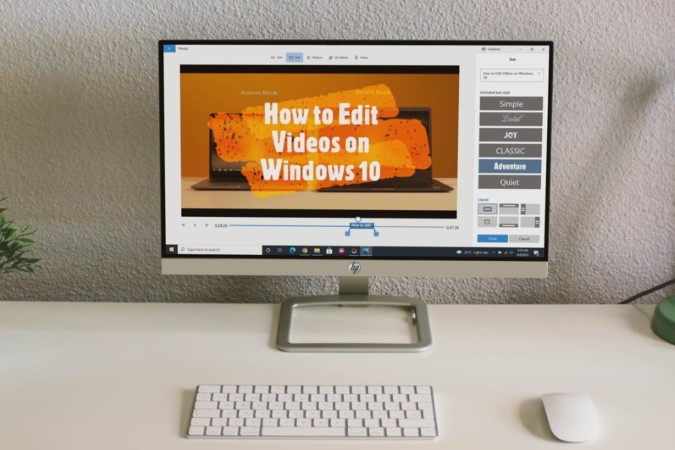 .
.When it comes to basic video editing, we often find ourselves looking for an easy-to-use and free third-party app or software. And while you can use Google Photos to do some light video editing on your phone, most folks often prefer a PC to do the job. Luckily, on Windows, Microsoft offers a Photos app that you can use to edit your videos. In this guide, we’ll learn how to edit videos on Windows 10 using the Microsoft Photos app. So, let’s get started.
How to Edit a Video on Windows 10
First, let’s start with how to open your video on Microsoft Photos’ video editor.
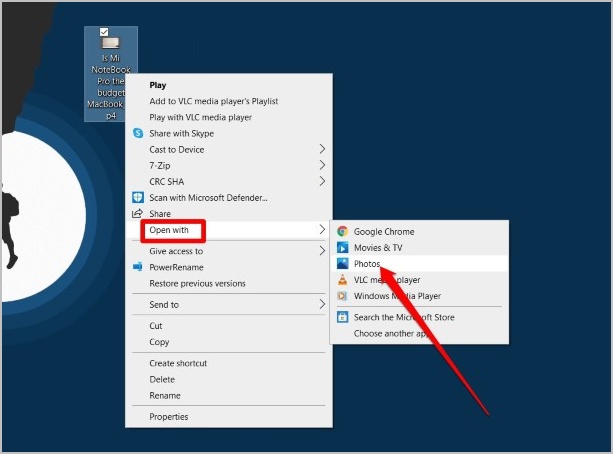
1. Right-click on the video that you wish to edit and go to Open with > Photos.
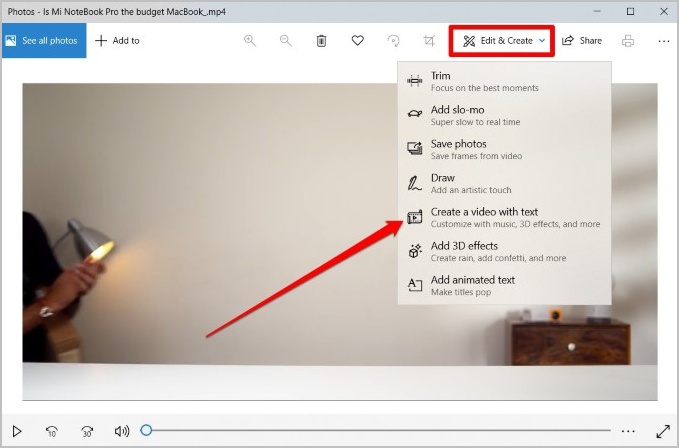
2. Expand Edit & Create menu at the top and select Create a video with text option from the list.
3. Now the video will open in the Microsoft Video Editor. Enter a suitable name for the project and hit OK.
Once you’re in the video editor, you can trim, crop, combine, draw, add text, music, effects, change playback speed, and do a lot more from here. Let’s see how.
How to Trim, Combine, and Crop a Video on Windows 10
Once you’re inside the Microsoft Video Editor, you can trim, split, and crop videos as you see fit. Read on to learn how.
Trim Video
1. Open your video in the Microsoft Video Editor and click on the Trim button.

2. Use the two sliders on either end to select a portion of the video. On your right, you’ll be able to see the length of the trimmed video.

3. Lastly, click on Done to save changes.
Split & Combine Clips
To make editing easier, you can also split your video into different parts and apply different effects to each of them.
1. To split the video, click on the Split button above the Storyboard.

2. Use the slider to split the video into two parts. The duration of both parts will be displayed in the top right.
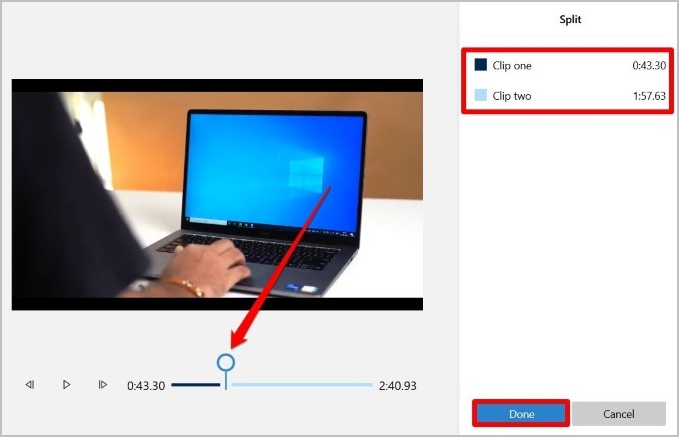
You can repeat the same steps above to split your videos into more parts. Additionally, you can drag and drop these clips to change their order.
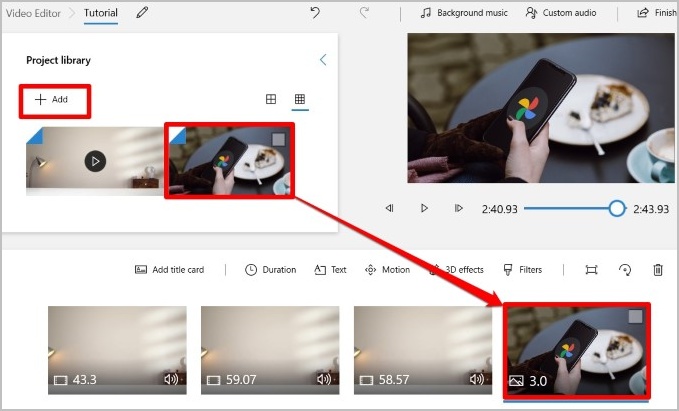
If you wish to add and combine more photos and videos to this project, click on the + Add button under the Project library. Once added, you can drag and drop the clips to your existing video to combine them.
Crop Video
Aside from trimming, you can also tweak the aspect ratio of the clip in the video editor. Here’s how:
1. In the video editor, click on the three-dot menu icon to select your preferred aspect ratio. You can also change the orientation from Landscape to Portrait and vice versa.

2. After selecting the preferred aspect ratio, use the Show or remove the black bars button to adjust the frame.

How to Add Text in Video on Windows 10
In the video editor, you can also display custom text and captions on clips to make your video more descriptive. Here’s how.
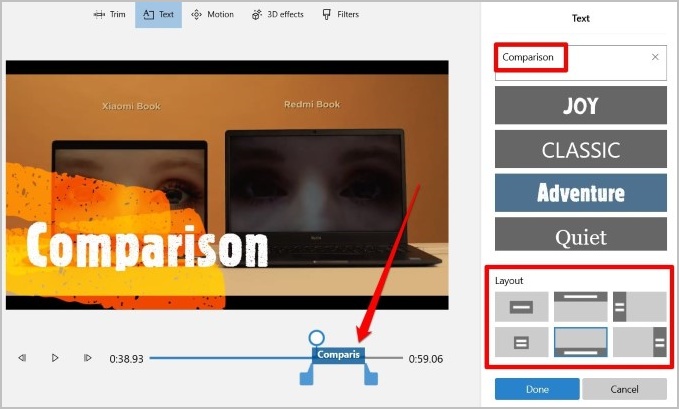
1. Select the clip to which you wish to add the text to and click on the Text button from the toolbar.

2. Next, enter your text in the text box and select from the various text styles. Under Layout, you can choose where you want to place the text.
3. Next, you can use the sliders on your left to select the duration for which you want the text to appear. Lastly, click on Done to save changes.
How to Change Playback Speed of Video on Windows 10
If you want to slow down or fast forward certain parts of the video, the app also allows you to change the playback speed of clips. Here’s how to do it.
1. Select the clip from the Storyboard for which you wish to modify the playback speed and click on the Speed button.
2. Now use the slider that appears on the screen to change the playback speed of the video.
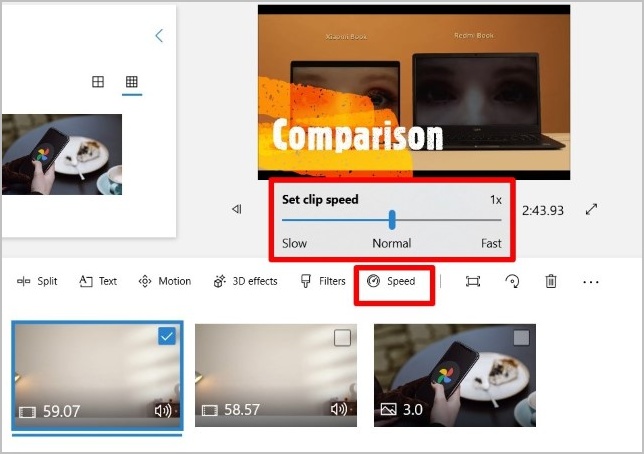
Once you do, the duration of the clip will be adjusted accordingly.
How to Insert Motion, Filters, and 3D Effects to Video on Windows 10
Aside from the basic editing tools, Microsoft Video Editor also offers some camera motions, filters, and 3D effects that you can utilize to make your video more professional-looking. Read on to learn how to use them.
Add Motion
1. Select the clip and click on the Motion button from the toolbar above.
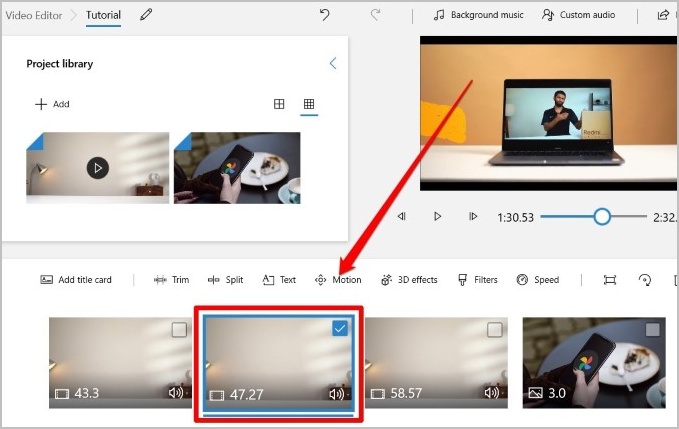
2. Select a motion effect for the image or clip. You can choose from Zoom in-out, Pan left, Tilt up/down, etc.

3. Once applied, click on Done.
Apply Filters
Similar to Motion, you can also apply a bunch of filters to your clips to make them more pleasing to the eye.
1. To add filters, select a clip and click on the Filters button above.
2. Choose from the available filters on your right and click on Done.

Unfortunately, you don’t get the option to change the intensity of the filter, but you do get a decent amount of filters to choose from.
Use 3D Effects
Aside from filters and motions, Microsoft Video Editor also offers a few 3D special effects that you can use to add extra spice to your video. Here’s how to use them.
1. Select the clip and click on the 3D effects button from the toolbar above.

2. In the following screen, under the Effects tab, you can either search for an effect or scroll down and find one.
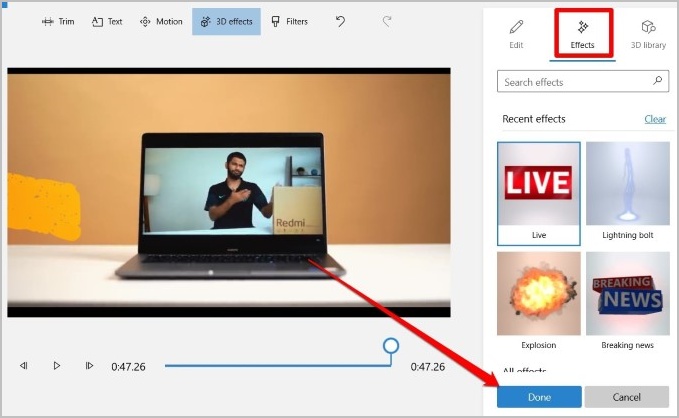
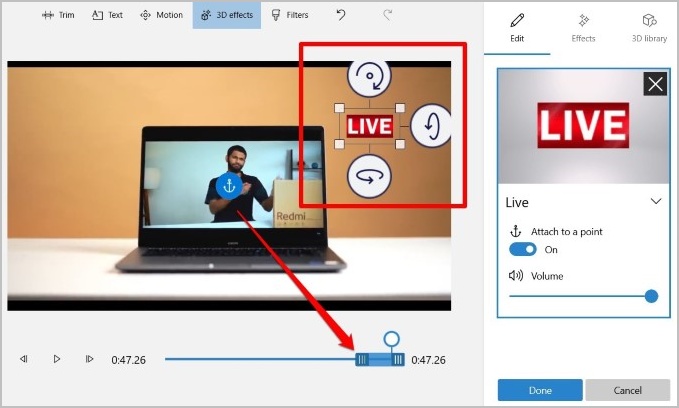
3. After selecting the effect, you can position as well as rotate or tilt it as you see fit. Plus, you can also use the slider to set a duration for which the effect should appear. Click on Done to save changes.
How to Add Background Music to Video
Once you have the video ready, you can add background music or insert custom audio to it. Here’s how.
1. To choose from the sounds offered by the Microsoft Video Editor, click on the Background music button at the top.

2. Next, select a piece of background music from the list. You can also preview the music before adding it. Set your preferable volume for the music and click on Done.

Alternatively, if you have a different audio track that you wish to add, you can also use that. Here’s how.
1. Select a clip and click on the Custom audio button at the top.

2. Now click on the Add audio file button to insert the track from your PC. After that, use the sliders in the preview section to specify when the audio should play.
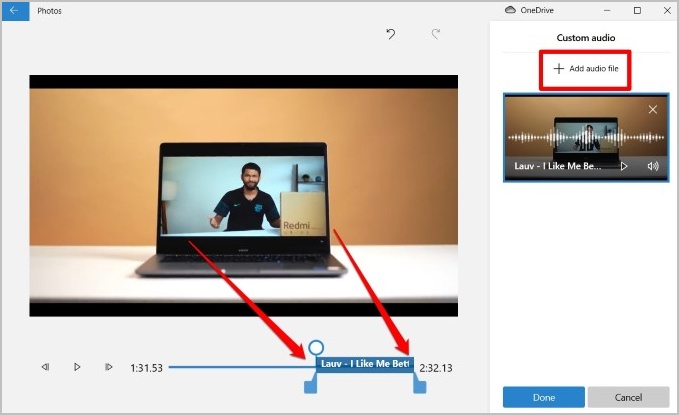
3. Lastly, click on Done.
How to Add Themes to Video
If styling your video yourself sounds too demanding, then Microsoft Photos also comes pre-loaded with a few themes that you can use to restyle the video with filters, music, and text styles. Here’s how.
1. Click on the three-dot menu icon in the top right corner and select Themes from the list.
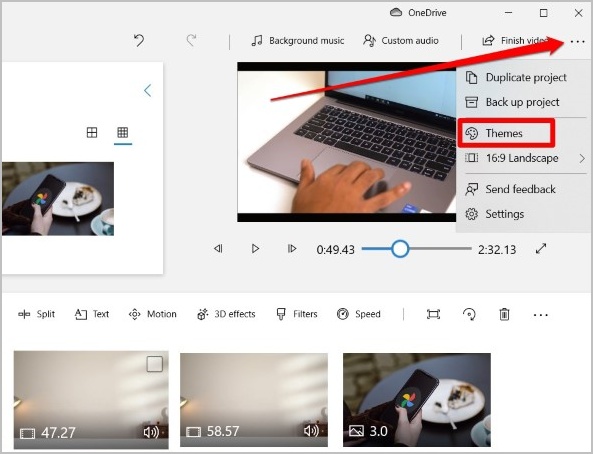
2. Preview the themes from the list and select the one you like. Click on the Done button to apply the theme.

How to Save the Edited Video
Once you’re done editing the video, here’s how to save your video.
1. Click on the Finish video option at the top.
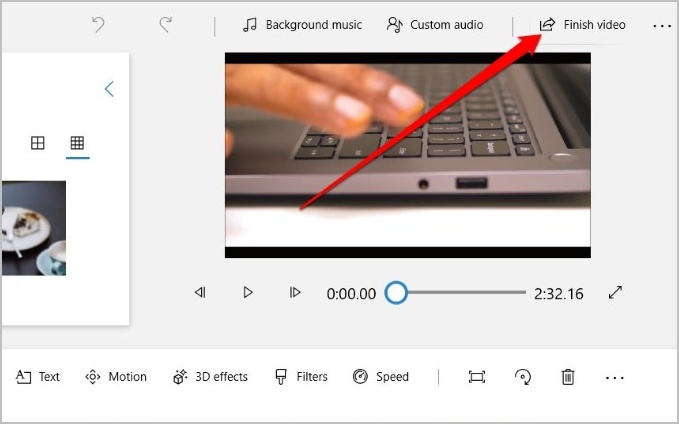
2. Next, you’ll be asked to select a Video quality for the exported video. Pick one using the drop-down menu and click on Export.

FAQs
Does Windows 10 have a Video Editor?
Yes, you can use Microsoft Photos to edit your videos on Windows 10 using the steps above.
How do you edit videos on Windows 10?
You can trim, crop, combine, add text, effects, custom music, and do a lot more by using following the steps above.
How do I install Video Editor on Windows 10?
You don’t need to download any separate app or software as Microsoft Photos comes pre-installed on Windows 10. You can use the app to edit videos on your PC.
Wrap Up: Edit Videos on Windows 10 with Microsoft Photos
Clearly, Microsoft wants its Photos app to be more than just a photo-viewer on Windows. With the number of photos and video editing options it offers, it sure does make it easy for you to make professional-looking videos without acquiring the substantial skillset.

