How to Enable and Customize the new On-Screen Keyboard on Windows 11

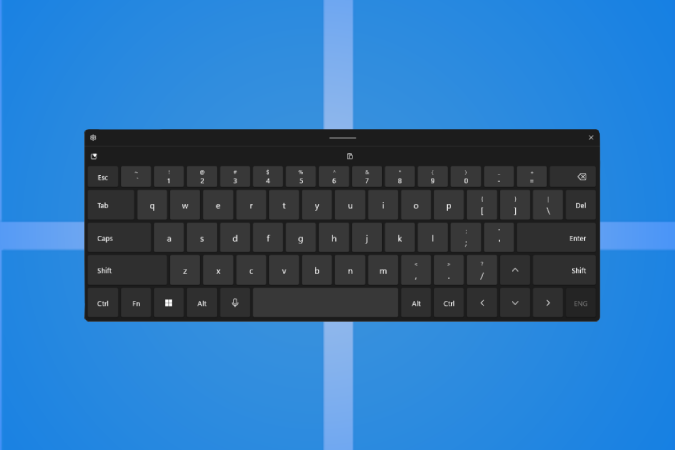
With Windows 11, Microsoft completely redesigned its touch keyboard with a new UI and features. For starters, Windows has two on-screen keyboards — an on-screen keyboard and a touch keyboard. While the on-screen keyboard can be opened anytime, the touch keyboard on the other hand used to work in tablet mode and was made specifically for the touch input. But that’s about to change in Windows 11.
The touch keyboard in Windows 11 works just like the on-screen keyboard and can be used any time. The update also brought a better UI and a ton of features. Though you can still use the old on-screen keyboard as a legacy app, the touch keyboard is the new on-screen keyboard that we all deserve.

The touch keyboard is not enabled by default, here’s how you can enable it.
How to Enable Touch Keyboard in Windows 11
As Windows 11 also don’t have a tablet mode, the touch keyboard can be accessed without enabling the tablet mode. This makes it work more like an on-screen keyboard which is even better than the original. To enable:
1. First press Windows key+I to open Settings or you can open the Start menu and open Settings from the All apps page.

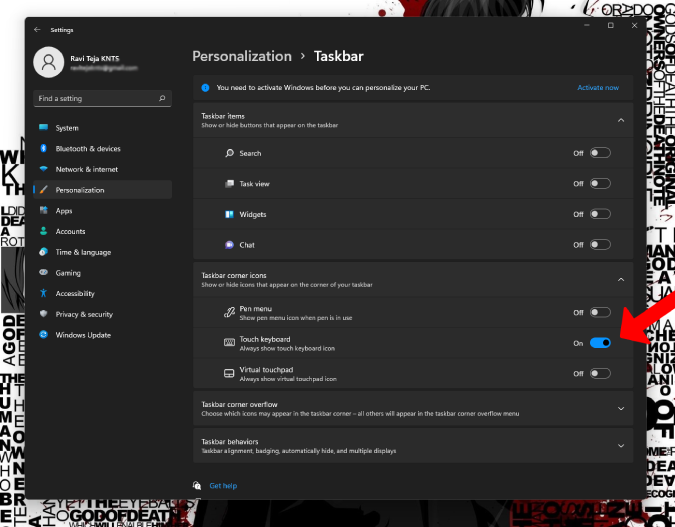
2. In the settings, click on Personalization and then select the Taskbar option.

3. Now, in the Taskbar settings, enable the toggle beside the Touch keyboard in the Taskbar corner icons section.

That’s it, the keyboard icon will be visible in the Taskbar. Click on the keyboard icon to open the new touch keyboard.

How to Customize Touch Keyboard on Windows 11
Windows 11 has brought new and exciting ways to customize the newly revamped touch keyboard. Now you can change the size, theme, and layout style of the touch keyboard. Here’s how:
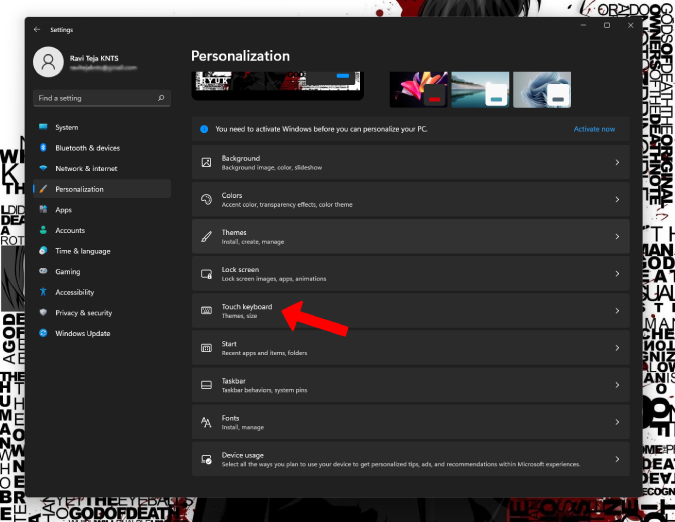
1. To change the size of the keyboard, open Windows 11 Settings by pressing WindowsKey+I. Now click on Personalization > Touch Keyboard.

2. Here you can change the keyboard size with the sidebar. You can also find the option to change themes, text size on keys, etc. on the same screen.

3. To change the layout quickly, open the touch keyboard and click on the cog icon at the top left corner of the keyboard and select the option Keyboard layout.

4. Now you can choose from the default, small, split, or traditional layouts directly from the keyboard itself.

Other Features on the Windows 11’s Touch Keyboard
While Customization is the bigger part, it’s not all. Here are a few of the features that you need to know about the Windows 11 touch keyboard.
Clipboard access – now the keyboard can show recently copied clipboard text on top of the keyboard to paste it.

Handwriting option – if you have a stylus and a touch screen Windows device, then you can just use the pen to write instead of typing.

Emojis, GIFs, and Emotes support – just click on the Emoji icon at the top left of the keyboard to add emojis, GIFs, emotes, etc.

How to Get Back Your Old On-Screen Keyboard
If you are not a fan of the recent changes and want to use the old on-screen keyboard in Windows 11, then you have multiple options open.
- Open Settings > Accessibility > Keyboard and turn on the toggle beside the On-screen keyboard.
- Just use the shortcut WindowsKey + Ctrl + O to open the on-screen keyboard.

- Open the Start menu and search for the On-screen keyboard to open it.
- Pin the On-screen Keyboard app on the Taskbar to access the app faster.
- Open Run and type OSK and click OK.
Wapping Up: Enable & Customize On-Screen Keyboard in Windows 11
The new touch keyboard offers emojis, clipboard support, and interesting features. But I wish other features like voice input would be added in later updates making it an all-in-one input option rather than just a keyboard. Also, voice input is much better than using the keyboard with a mouse.


