Camera and Microphone on Mobile and Web
Similar to apps on your devices, browsers like Chrome also need permission settings that vary from site to site. And while you wouldn’t really need to configure them on a daily basis, you will need to give Chrome access to them if you’re going to use services like Zoom or Google Meet that need access to your camera and microphone. Ideally, a website would prompt you when it requires access to your camera or microphone. But if you’ve denied them previously or just want to configure permissions yourself, this post will show you how to allow Chrome access to camera and microphone on both mobile and PC.
How to Allow Chrome Access to Camera and Microphone on Web
If you’re using Google Chrome on your PC, here’s how to allow Chrome access to the camera and microphone on your Windows or Mac.
1. Launch Google Chrome on your PC. Click on the three-dot menu icon in the top right corner to open Settings.

2. Now switch to the Privacy and security tab on your left and go to Site settings.
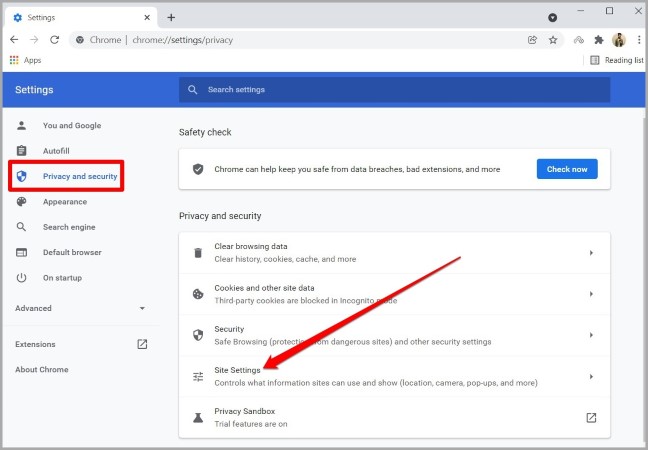
3. Next, under Permissions, click on the Camera option.
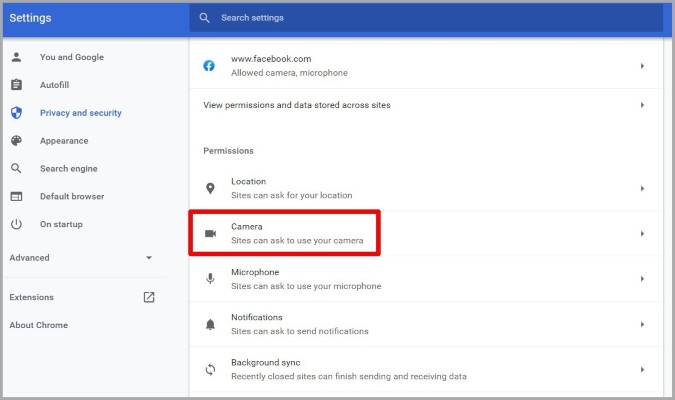
4. Use the drop-down menu to select your webcam and select Sites can ask to use your camera option.

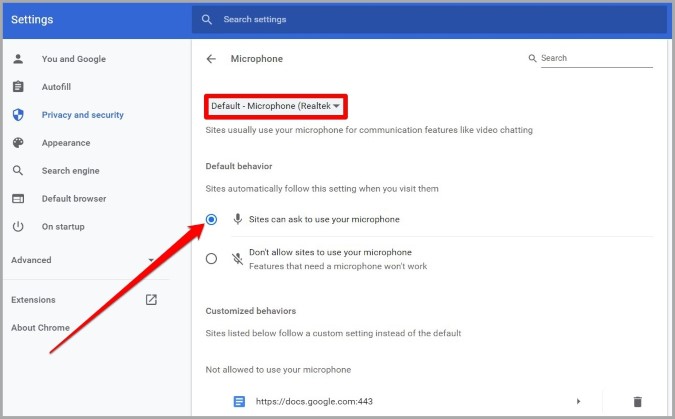
5. Now go back to the Site Settings page and click on the Microphone option.
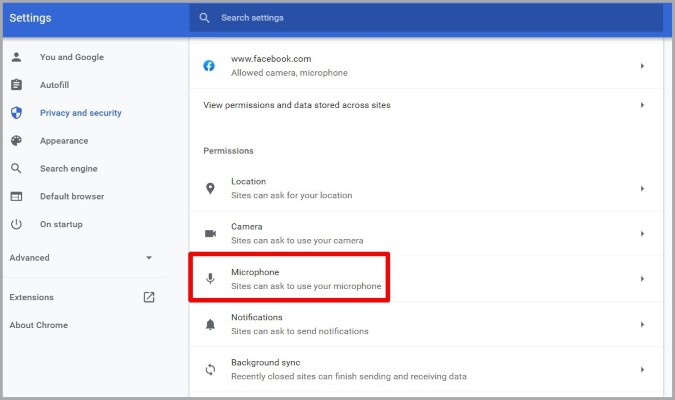
6. Again, use the drop-down menu to select your preferred audio device and select Sites can ask to use your camera option.
How to Allow Chrome Access to Camera and Microphone on Android
If you’re using an Android device, you’ll need to allow Chrome permission to use the camera and microphone using the Settings app. Here’s how.
1. Open the Settings app on your phone and go to Apps and notifications. Scroll down to locate Chrome on the app list.

2. Next, go to Permissions. Here, you’ll find a list of permissions for Chrome.
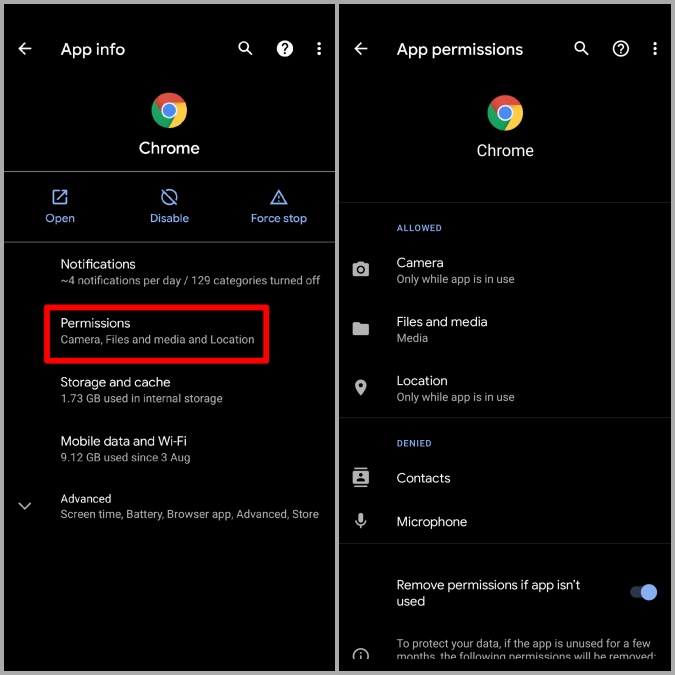
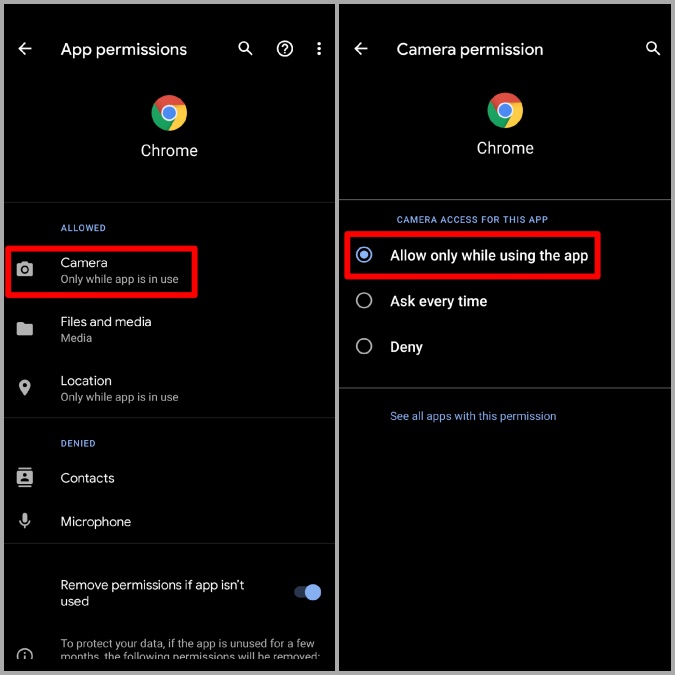
3. Tap on the Camera option and select Allow only while using the app.
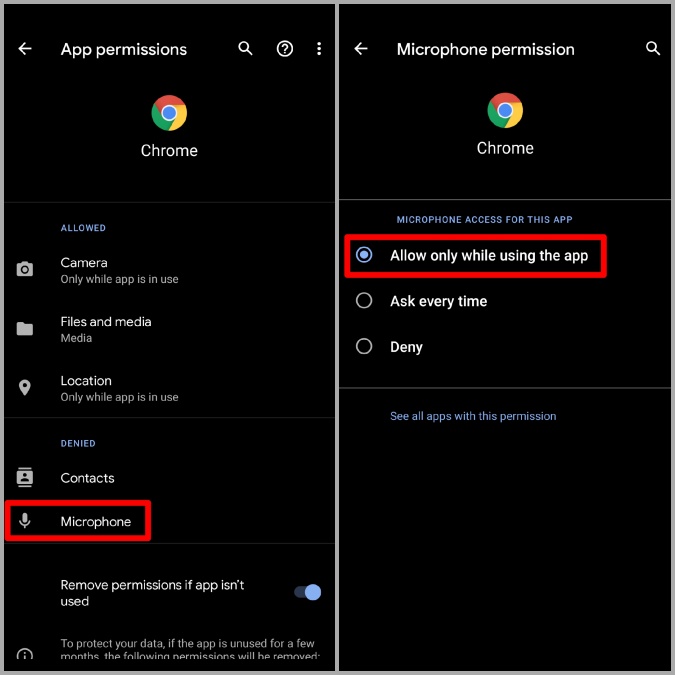
4. Now go back to the App Permissions page. Tap on Microphone and select Allow only while using the app.
After allowing the required permissions to the Chrome app, you’ll need to explore Site settings in Chrome to make sure that the websites are allowed access to Camera and Microphone. Read on to learn how.
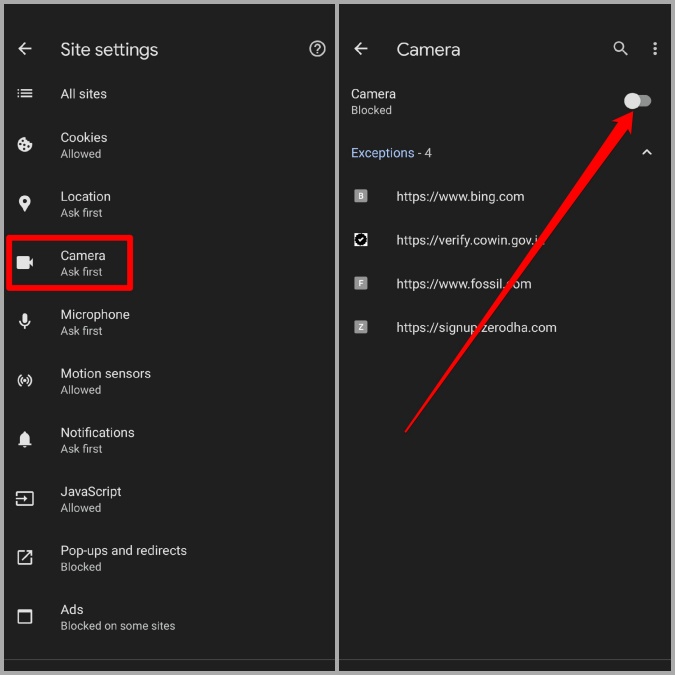
1. Launch Google Chrome on your phone. Use the three-dot menu icon in the top right corner to open Settings.

2. Scroll down to the Advanced section and tap on Site settings.

3. Go to the Camera option and toggle on the switch to allow websites to use it.
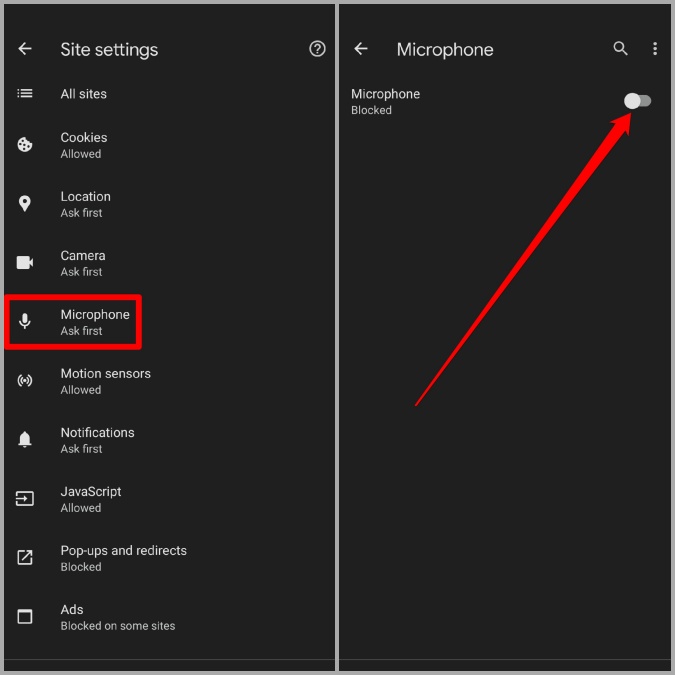
4. Now go back to the Site settings page, tap on Microphone, and toggle on the switch to enable it.
How to Allow Chrome Access to Camera and Microphone on iPhone
If you’re on an iPhone, allowing Chrome access to the camera and microphone is slightly a different experience. Here’s how.
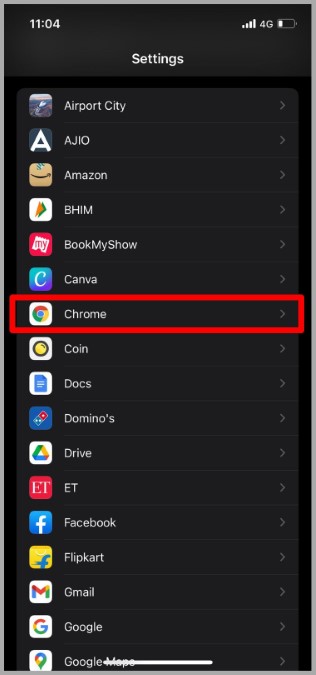
1. Open up Settings on your iPhone. Now scroll down to locate and tap on Chrome.
2. Under Allow Chrome to Access, toggle on Camera and Microphone option.
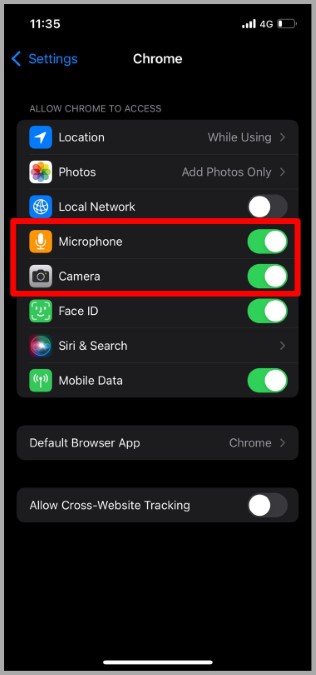
Do note that the Camera and Microphone option will only appear if a website has previously asked for access to it. So, if you can’t seem to locate the Camera and Microphone options using the steps above, you’ll need to open a website like Webcam Test on your iPhone that requests permissions for your camera and microphone. Once you do, use the above steps to allow Chrome access.
FAQs
Can I disable access to camera or microphone for a specific site on Chrome?
Yes, but only on Chrome for PC and Android. Sadly, Chrome for iPhone does not allow you to manage camera or microphone permissions on a site-to-site basis. So, if you wish to modify a website’s access to the camera or microphone, you’d have to do it for the entire app
How to select a different camera or microphone device in Chrome?
To select a different webcam or microphone on Chrome, navigate to Site settings in Chrome and use the drop-down menu to select from the available choices.
Wrap Up: Allow Chrome Access to Camera and Microphone
As we just learned, allowing Chrome access to the camera and microphone is pretty straightforward on all the platforms.


