How to Reverse a Video on Desktop and Mobile

Whether you are on Mac, Windows, Linux, or on your smartphone powered by Android or iOS, reversing a video is something that most video editors do. If you are looking for an easy and quick way to reverse a video, here is how you can do it on all popular desktop and mobile platforms.
How to Reverse a Video on Android and iOS
There are a lot of video editors on Android and iOS that can reverse the video, but when it comes to ease and speed, nothing comes close to Reverse Movie FX. It is a dedicated app to reverse videos and comes loaded with cool video editing features such as special music effects, output both original and reversed video, and more.
1. First download the Reverse Movie FX app from the Play Store and App Store.
2. Now, open the app and tap on the Start Reverse option. Then choose to Record movie or select Choose movie option to select the video file from your device.
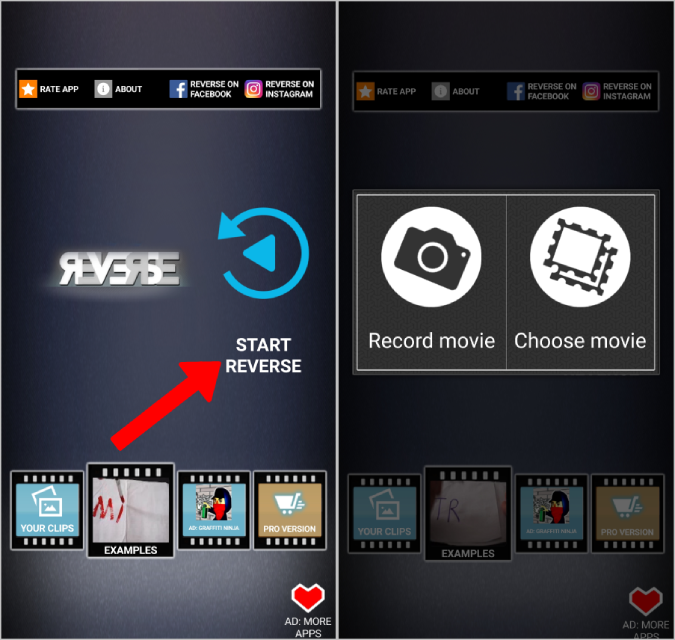
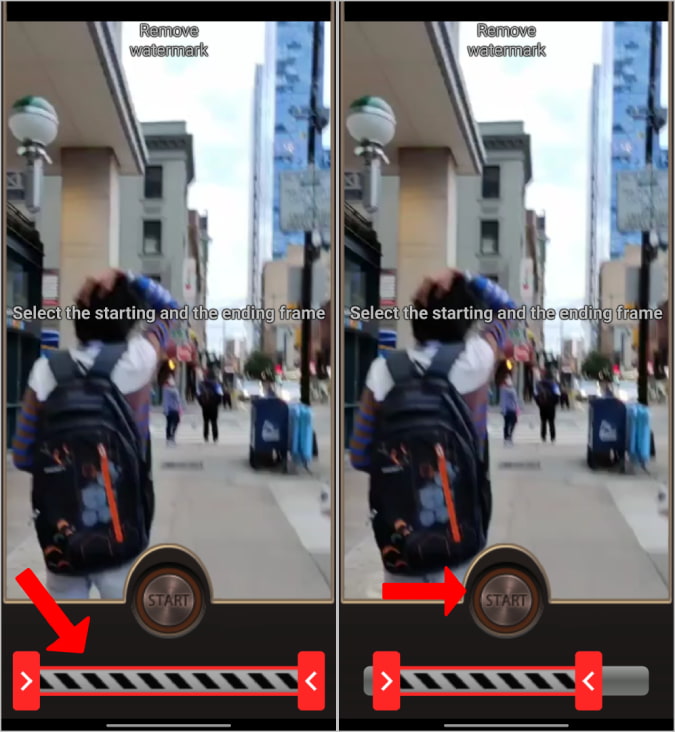
3. Once the video clip is recorded or selected, it will open the editor where you can select the start and endpoints of the video that you want to reverse. Once done, click on Start.
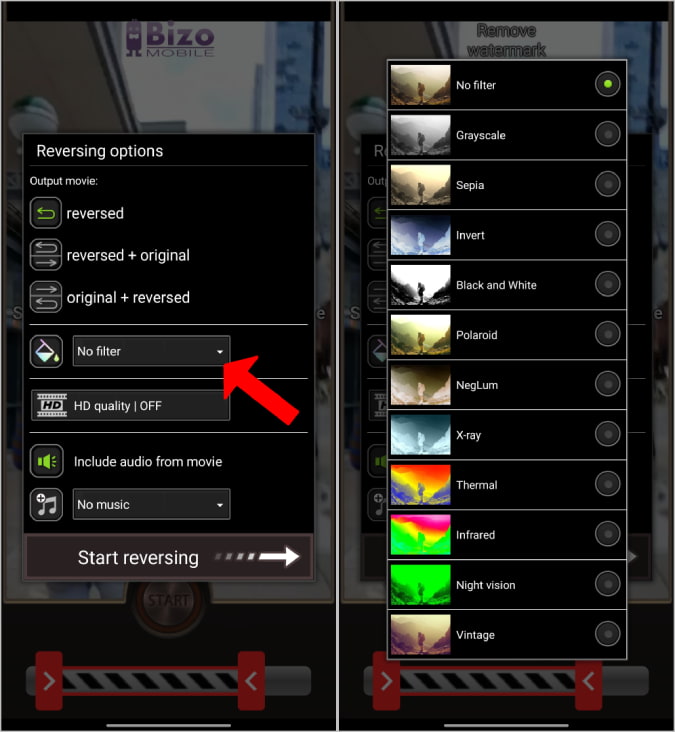
4. This will open the Rendering options menu in the pop-up, where you can select the output style, filter, quality, and music that you want to add.
5. As the music of a reversed video will get distorted, the app provides special music that works great on reversed videos. Or you also have the option to upload your own music from internal/external memory.
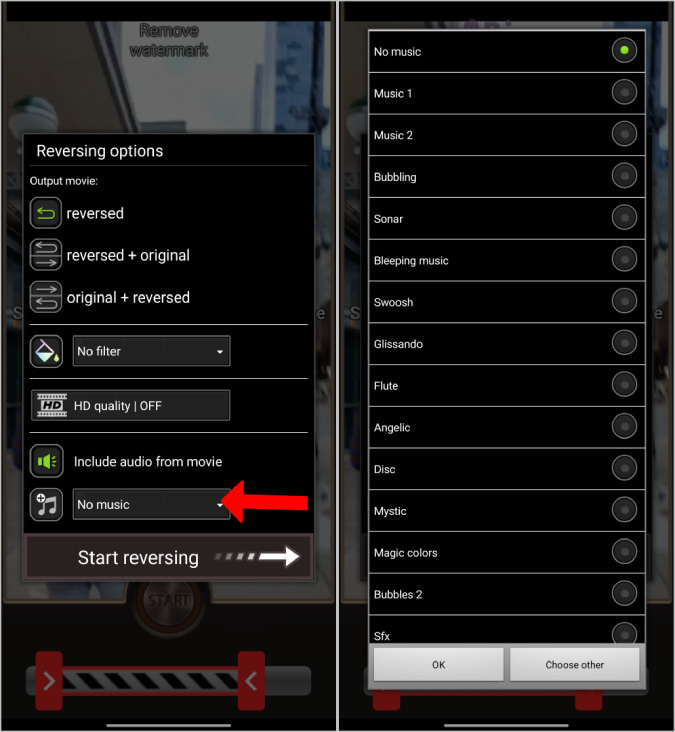
6. Once done, click on Start reversing. The app will reverse the video and save it on your device. It also shows you a preview of the reversed video once done.
On the home page of the app, there’s an Examples section where it shows example videos for reversed videos with some tricks to add interesting effects to reversed videos.
While Reverse Movie FX is an app dedicated to reversing videos on both Android and iOS, there are powerful video editors that can do a lot more. Some of them include Inshot, Kinemaster, Filmora Go, and Power Director.
How to Reverse a Video on Mac, Linux, Chrome OS, and Windows
Desktop operating systems are filled with professional video editors, some of which we will mention below. Of course, all of these video editing apps can reverse videos too. But if you are looking for an easy way, you can’t go wrong with the Clideo web app.
Note: Note that the free version adds a watermark to the video. You can remove that with the pro subscription at $9/month.
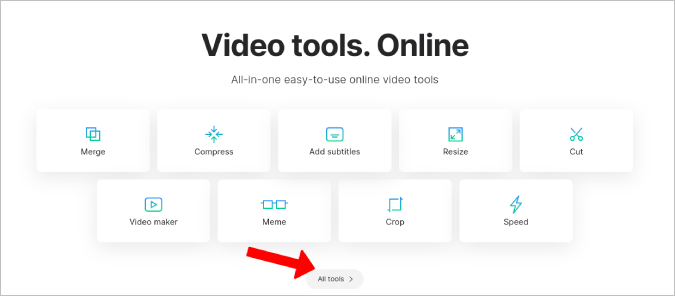
1. Open Clideo, click on All tools, and select Reverse Video.
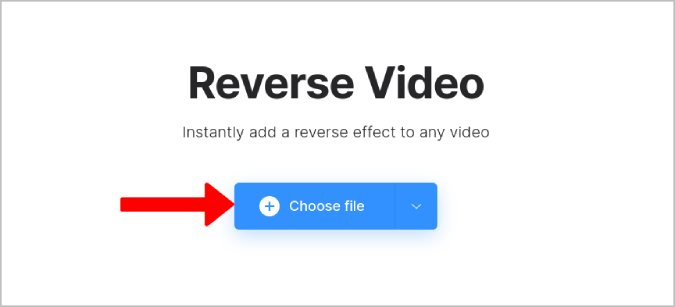
2. Here click on Choose file and select the video from your computer, Google Drive, or Dropbox.
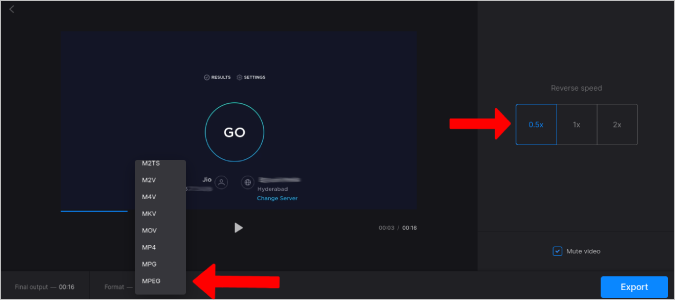
3. Once selected, the video will be uploaded and begin playing in reverse. You can adjust video playback speed and file format.
4. Finally, if you want to mute the video, enable the checkbox beside Mute video option and click on Export to save the output.
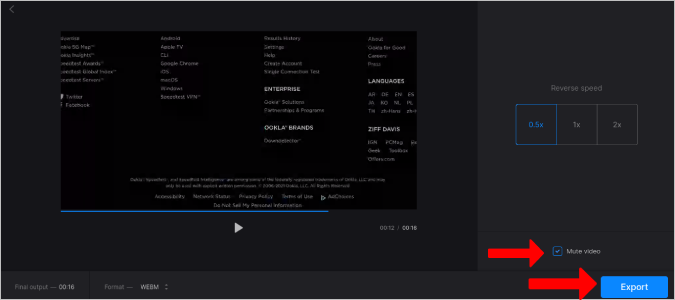
This will export the video in reverse in the file format you had selected.
Clideo is a combination of multiple small video editing tools. There are tools to add music, resize, merge, compress, speed pace, rotate, and crop if you want all for free. Note that the free version adds a watermark to the video.
If you don’t want the watermark or pay for a subscription, there are plenty of other video editors for desktop and web that can reverse videos. Some examples include Kapwing web app, Filmora, Premiere Pro, and Final Cut Pro.
Wrapping Up: Reverse Video on Desktop and Mobile
You can either go with Reverse Movie FX and Clideo apps or use any of the above-mentioned video editors. I personally prefer to edit on Filmora Go on smartphones and Davinci Resolve on desktop. You can choose the one that suits your needs.


