How to Edit Photos on Windows 10/11 Using Microsoft Photos and Paint 3D
Most photos you see online have gone through some level of post-production. Whether it’s something as little as cropping out unwanted parts or applying filters to add a little spark, editing your photos is something that all of us do. If you’re a Windows user wondering how to edit photos on your Windows 10 or 11, you won’t have to look far as Microsoft offers some good image editing apps that come pre-installed. In this post, we’ll learn how to edit photos with Microsoft Photos and Paint 3D. So, let’s get started.
Edit Photos on Windows 10/11 With Microsoft Photos
Microsoft recently unveiled a revamped version of the Microsoft Photos app soon after releasing Windows 11. And it has been a welcome addition as the app matches the all-new Windows 11 UI with its rounded corners and floating menus.
To get the newer version of the Photos app on Windows 11, check for updates in the Microsoft Store. That said, if you’re using the old version of the Photos app on your Windows 10, the editing experience is somewhat similar.
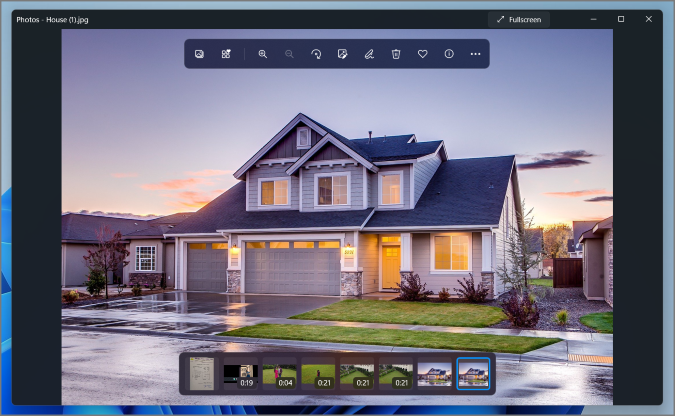
Once you’ve got your hands on the new Microsoft Photos app, here’s how you can use it to edit photos.
Getting Started
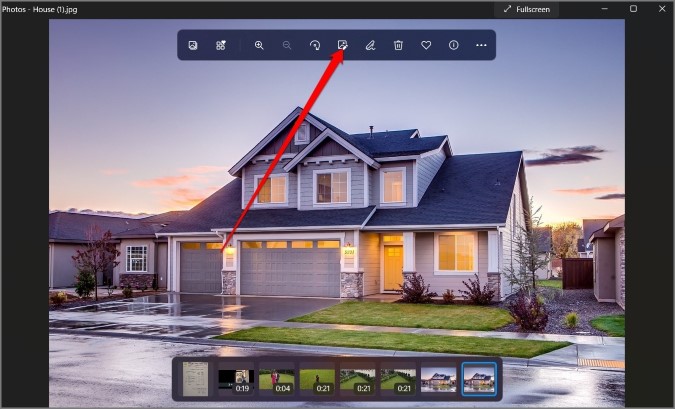
Once you’ve opened your photo in the Microsoft Photos app, click on the Edit image option from the toolbar. Alternatively, you can use the Ctrl+E shortcut to begin editing.
Crop and Rotate
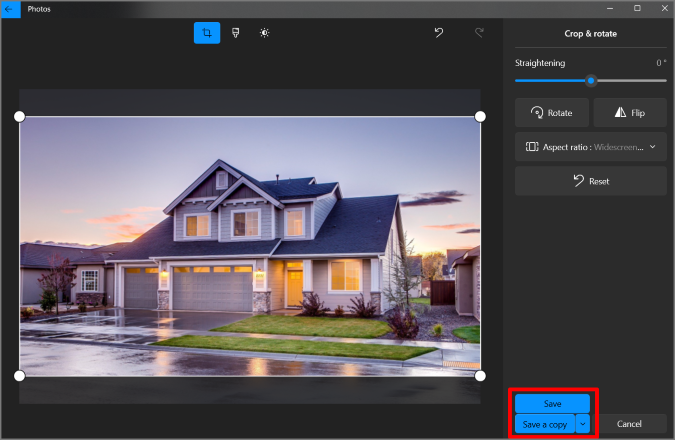
Inside the editor, you can adjust the frame surrounding the image to crop your photo. Additionally, you can also change the aspect ratio by using the drop-down menu in the right sidebar.
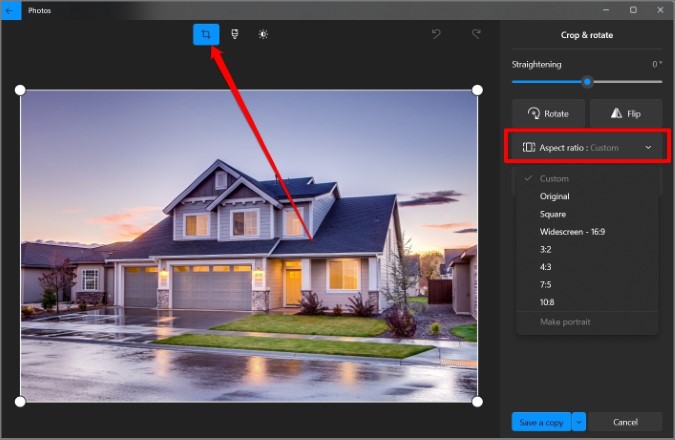
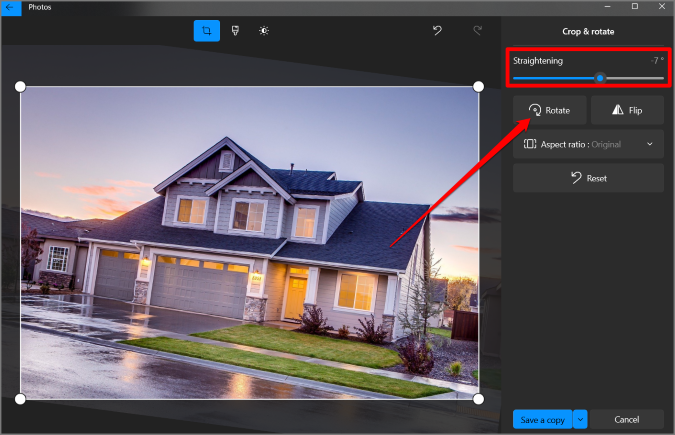
If you wish to rotate your photo, you can click on the Rotate button or use the Ctrl+R shortcut to turn the selected image 90 degrees to the right. If that’s too much and you only want to adjust your photo by tilting it slightly, use the slider under Straightening.
Add Filters
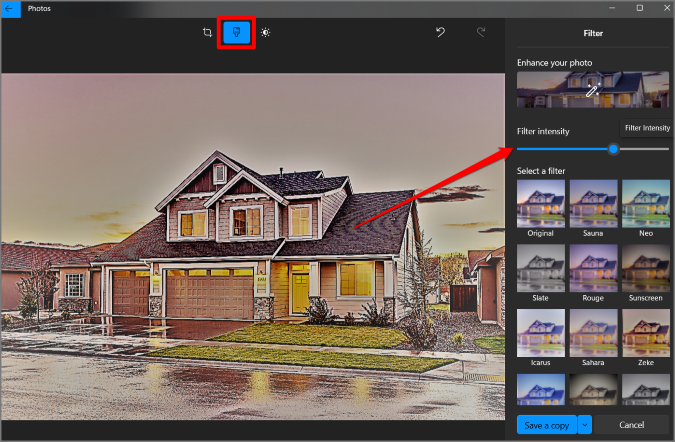
Just like other image editing apps, the Photos app also carries various filters that you can use to liven up your images. To do that, click on the Filter option at the top. Choose the filter that you wish to use from the right sidebar. After applying it, you can tweak the intensity of the filter via the slider under Filter intensity.
Make Adjustments
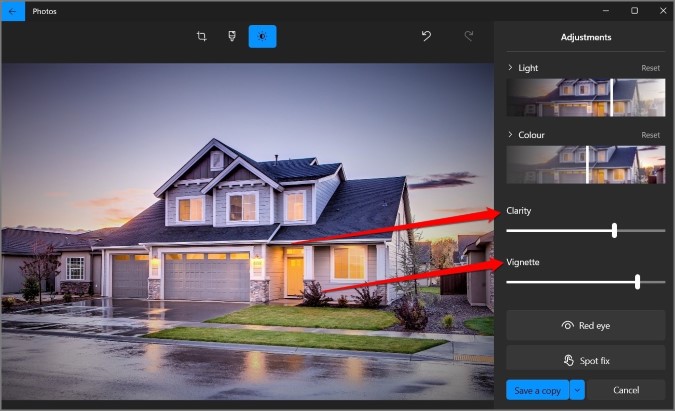
If you only wish to make minor corrections to your photo like light, contrast, shadow, etc., visit the Adjustment tab at the top. Here, you can change the amount of Light and Color in the photo by moving the slider underneath them.
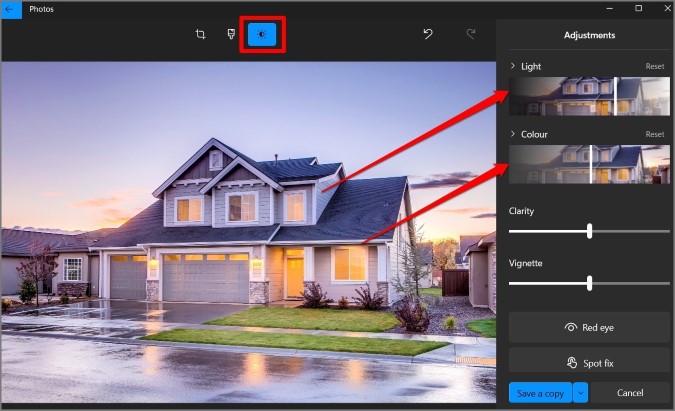
Similarly, the Clarity slider helps outline specific edges (when moved to its right) or blend them into the background (when moved to its left). The Vignette slider will add a white or black vignette effect to the corners of the photo.
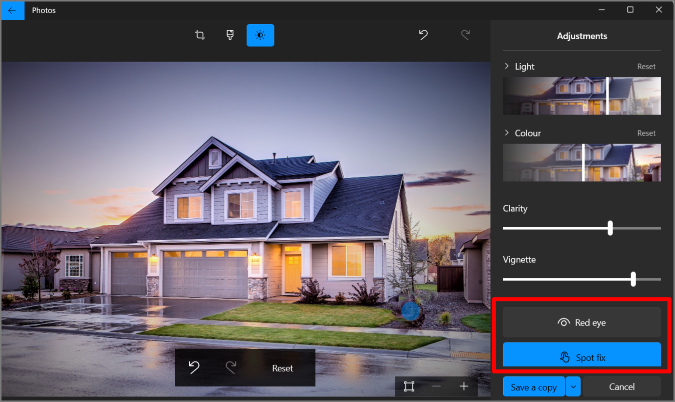
Lastly, the Red Eye tool lets you remove any red glare caused by a camera flash from a person’s eye. And the Spot fix button lets you fix obscure fine details by removing the targeted spot and filling it based on the surrounding area.
Draw on Photos
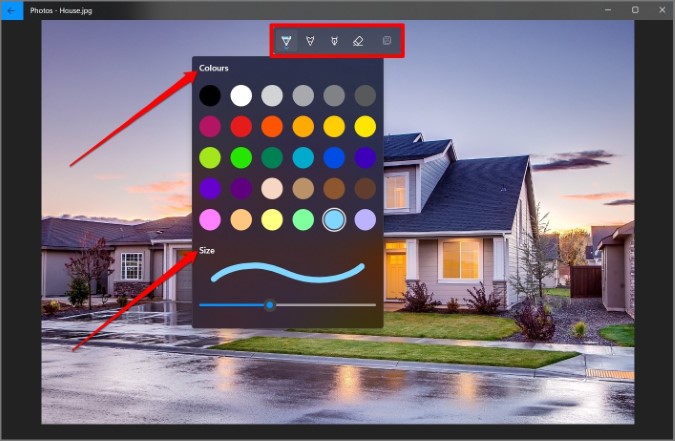
Aside from the above, the Photos app also allows you to draw or doodle on your photo. To do that, click on the Draw option from the floating toolbar at the top. Next, pick your preferred pen from the available options and modify its Size and Color from a range of palettes.
Save Your Edits
Once you’re done editing your photo, click on the Save a copy option or overwrite the original by clicking on the downward arrow next to it and clicking on Save.
How to Edit Photos on Windows 10/11 with Paint 3D
While the Microsoft Photos app fulfills your basic editing requirements, it’s still far from a complete editing experience. So, if you want options like the ability to add text, stickers, shapes, and more, you’ll need to edit your images in Paint 3D. Read on to learn how.
Getting Started
Right-click on the image that you wish to edit, go to Open with, and choose Paint 3D.
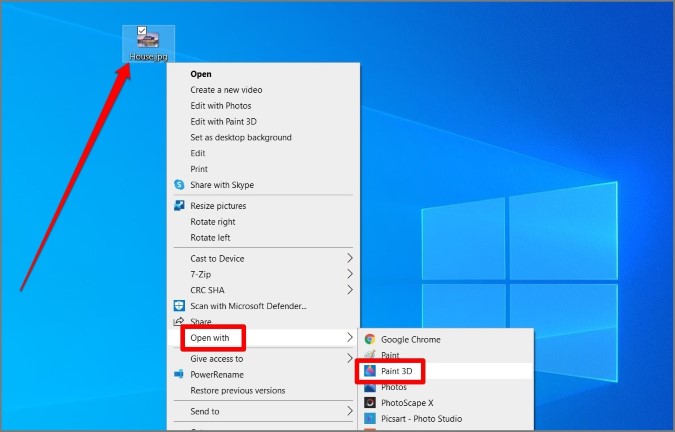
Now your photo will open in Paint 3D and you’re all set to edit it from here on.
Selection Tool
The Selection Tool in Paint 3D helps you select and remove a certain part of the image and edit that portion. Here’s how to use it.
1. Click on the Select button from the toolbar above and crop the portion of the image to edit it.
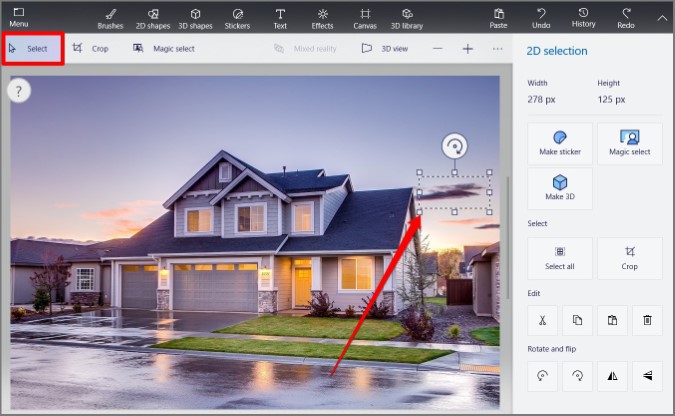
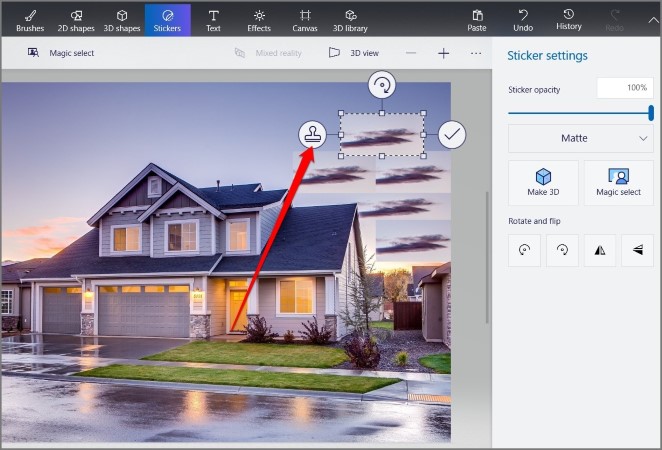
2. Once selected, you can cut, crop, copy, rotate, and flip the selected portion by using the side menu on your right. On top of that, you can also convert it into a sticker by using the Make sticker option.
Magic Select Tool
While you can use the Selection tool above for basic needs, Paint 3D also has a slightly more advanced selection tool called Magic Select that can automatically detect and select objects on your photo. Here’s how it works.
1. Click on the Magic select option from the toolbar above. Now adjust the borders that appear around the image to focus on the object that you wish to select. Once done, click on Next in the right sidebar.
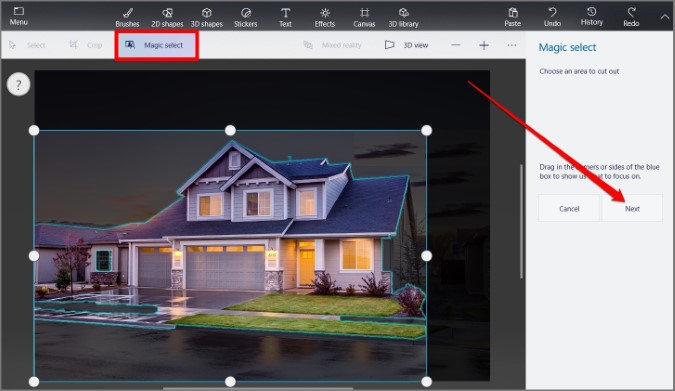
2. Next, you can use the Add and Remove tool to make minor adjustments to your cutout. Once you’re satisfied with the selection, click on Done.
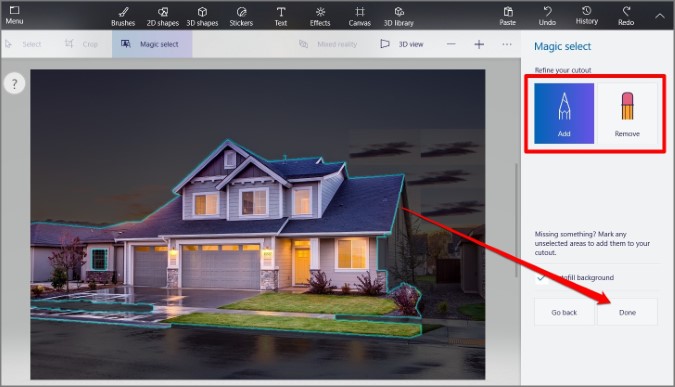
Magic Tool can come in handy when you want to remove a certain object from your image or remove background from a photo.
Add Text
Paint 3D also allows you to add 2D and 3D text to images. To do that, click on the Text option at the top. Now click on the image and a text box will appear. You can move, resize, and rotate the text box as per your need. Additionally, you can also modify the font type, size, format, etc.
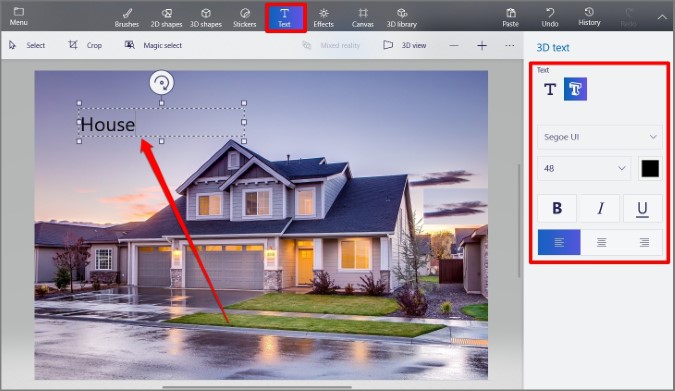
Add Stickers and Shapes
Paint 3D also has a stickers library that you can use to liven up your image. You can use the Stickers option at the top to add some of them. Plus, you can also add and use your own stickers or create one using the Magic Tool.
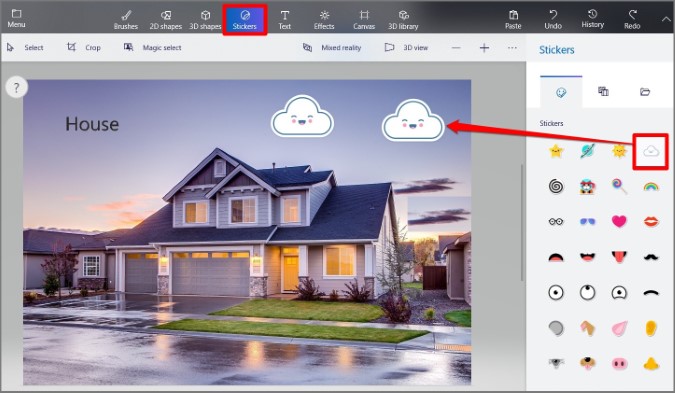
Similar to stickers, Paint 3D also has some 2D and 3D shapes that you can add to your image by using the 2D shapes and 3D shapes buttons at the top. You can check out the available shapes or find new ones from its library.
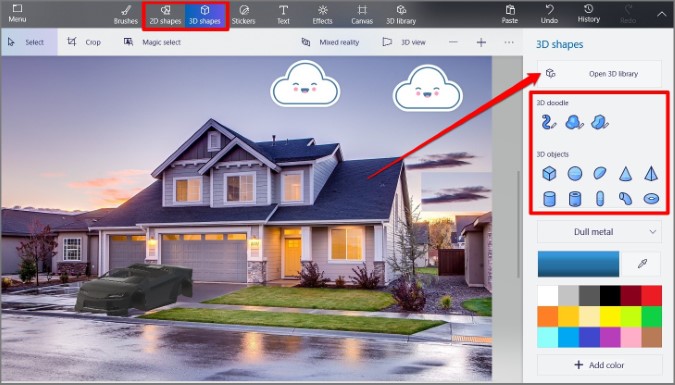
Once added, you can change the shape’s color, size, rotation, and more using the sidebar menu on your right.
Save Image
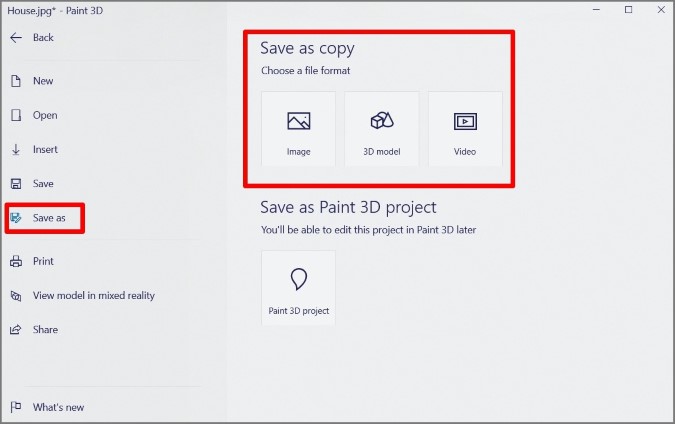
Once you’re done editing the image, you can easily save it in a format of your choice by opening Menu > Save as. Alternatively, you can also press Ctrl+S to save the image in paint 3D.
FAQs
Does Windows 10 have photo editing software?
Yes, you can use both Microsoft’s Photos app and Paint 3D to edit photos. Moreover, Microsoft’s Photos app is also capable of editing videos with its feature-rich video editor.
How to resize images in Paint 3D?
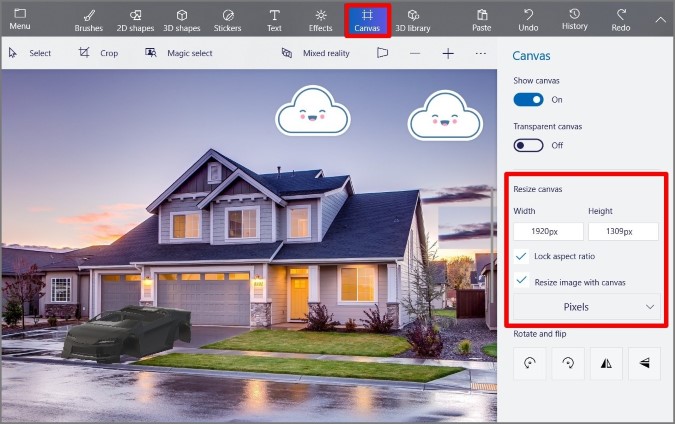
To resize your image in Paint 3D, click on the Canvas option at the top and use the sidebar menu on your right to define a new width and height for the image either in Pixels or Percentage.
Wrap Up: Edit Photos on Windows 10/11
All in all, with these two apps, there’s no need to look for a third-party app to edit photos on Windows 10/11. For basic editing, you can use the Photos app from Microsoft. And for slightly more advanced needs, you can count on Paint 3D to do the job.
